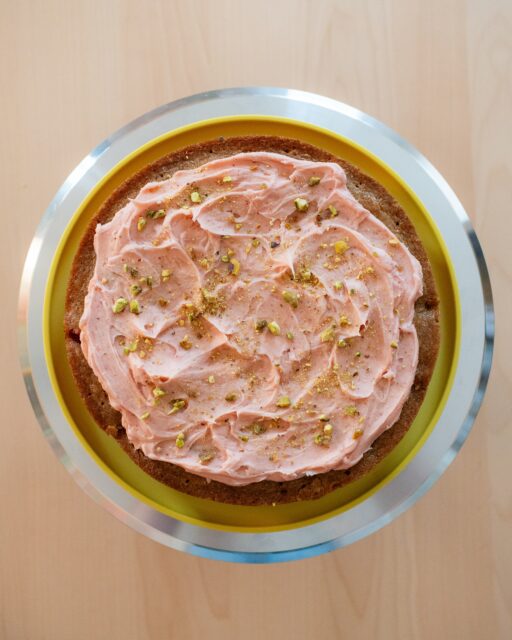
These apple biscoff cheesecake bars DELIVER—let me tell you, friends. First is the biscoff cookie crust (already on board), then that creamy cheesecake layer topped with cinnamon-spiced apples (still listening), and finished off with a brown sugar oatmeal crumble (wow). Yes please!
So excited to partner up with my buddies over at Yes! Apples again for this recipe! Their EverCrisp variety takes these apple biscoff cheesecake bars to the next level. Let’s bake!
This post is sponsored by Yes! Apples.

Some Materials You’ll Need:
- 8×8 in. square cake pan
- Hand mixer (stand mixer works too, just more hassle)
- Various sized mixing bowls
- Measuring cups and spoons
- Spatula
- Baking Spray (love this one with flour)
- Parchment paper
- Cooling rack


Biscoff Cookie Crust
When you’re making the crust, make sure your butter has had time to cool back down after being melted. If your butter is still too warm when you go to mix it with the cookie crumbs, it’ll make it a little too greasy. It’ll also be prone to burning faster when you go to bake it.
To help achieve a smooth, even layer with your biscoff crust—use the back of a 1/4 measuring cup! I pour in my crust mixture, generally pat/flatten it down with hands first (making sure to get it in all 4 corners), and then use the measuring cup to even things out. Just move it around in a circular motion around the top until things are mostly evened out. I then might go in with a spatula to make sure the edges and corners are flat and even as well.
You don’t have to wait till your crust is completely cool either before pouring over your cheesecake layer. At that point you’re about to layer everything and bake, so it doesn’t matter. You can use this crust too for other bar recipes that might call for graham crackers instead. It makes these apple biscoff cheesecake bars a dream—I love it.
Tips & Tricks for Making Perfect Cheesecake
If you’re looking to get fluffy, creamy, perfect cheesecake every time, here’s a few tips that should help!
- Make sure all of your ingredients are actually at room temperature—an absolute MUST. When making something like cheesecake, you want all of your ingredients to come together evenly at the same consistency. If you have soft cream cheese, cold eggs, and cold sour cream—things might get a bit lumpy. This is the most important tip I could give you for perfectly creamy cheesecake!
- After you’ve beat together your cream cheese, sugar, and eggs, be careful not to over-mix your sour cream when you add it in. You don’t want to deflate all of that much-needed air you’ve just whipped into the mixture.
- When you go to bake these bars, be careful not to over-bake them! You want to keep the cheesecake layer light and creamy. If you bake it too long, it can end up too dry.
- How to tell when cheesecake is done: for these bars it can be a little tricky because of the crumble on top, but there’s still a way to tell! Just give the pan a little jiggle when you’re around the 35 minute mark. If the edges stay put and are set, but the middle still had a bit of a jiggle—you’re done! If the whole thing is still pretty mobile, give it another 5 minutes and check again.


Layering Your Apple Biscoff Cheesecake Bars
Like I mentioned before, you don’t have to let your crust cool down completely before pouring over the cheesecake. You can easily whip up the cheesecake mixture and have it ready by the time your crust is done baking.
Once your cheesecake layer is down, give it a few good heavy slams on the counter to knock out any air. Then gently sprinkle your spiced apples overtop. Try not to drop from too high or they’ll sink into the cheesecake, disrupting the visual separation of layers.
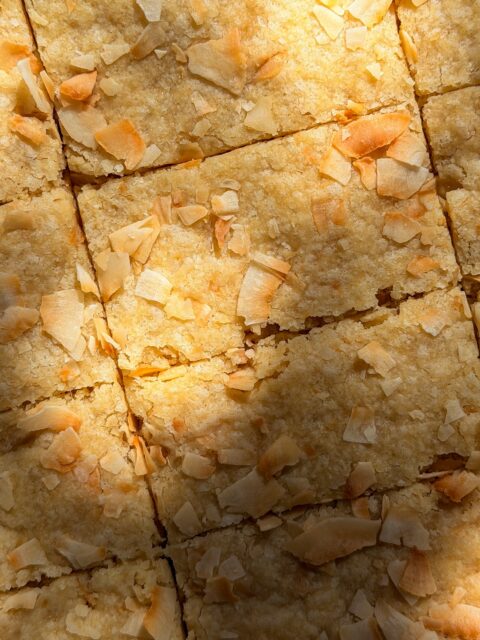
Then you’ll sprinkle over that crumble. It can seem like a lot and you might be tempted to hold some of it back and not use it all—fight that urge! The ratio of crumble, to cheesecake, to crust is one of the best parts of these apple biscoff cheesecake bars. Trust me!


The Real Star of These Bars? The Evercrisp from Yes! Apples.
If you truly asked me to pick one apple to eat for the rest of my life—it would be these babies. The EverCrisp from Yes! Apples is the love child of a Honeycrisp and Fuji apple; it has THE perfect crunch and is incredibly juicy sweet. Once you go EverCrisp, you don’t look back. I promise!
Click here (or the button below) to find where Yes! Apples are sold at a retailer near or purchase directly from their website! Round up some EverCrisp and get baking these apple biscoff cheesecake bars in no time flat.

I hope you give these apple biscoff cheesecake bars a try, friends! They’re not too sweet, super creamy, and just the right amount of spices to go around. Be sure to tag me over on Instagram if you make them—would love to see and share!
Happy baking!
Print
Apple Biscoff Cheesecake Bars
- Prep Time: 45 Min.
- Chill Time: 4 Hrs.
- Cook Time: 50 Min.
- Total Time: ~5 Hrs. 30 Min. (including chill time)
- Yield: 12 Bars 1x
Description
These apple biscoff cheesecake bars DELIVER. First is the biscoff cookie base, then that creamy cheesecake layer topped with cinnamon-spiced apples, and finished off with a brown sugar oatmeal crumble. Yes please!
Ingredients
Biscoff Crust
- (1) 8.8 oz. Package of Biscoff Cookies (250g)
- 5 Tablespoons unsalted butter (75g), melted and cooled
Cheesecake Layer
- 12 oz. cream cheese (full fat), room temperature (335g)
- 1/4 cup granulated sugar (60g)
- 2 large eggs, room temperature (110g)
- 1/2 cup sour cream (full fat), room temperature (115g)
- 1 teaspoon pure vanilla extract (3g)
Apple Crumble
- 1 large EverCrisp apple (Yes! Apples) peeled/cored/diced (160g, ~1 cup)
- 1/2 tablespoon granulated sugar
- 1/2 teaspoon ground cinnamon
- 1/2 cup light brown sugar, tightly packed (105g)
- 1/2 cup all-purpose flour (65g)
- 1/2 cup old-fashioned rolled oats (45g)
- 4 tablespoons butter, room temperature (60g)
Instructions
Prep
- If you haven’t already melted your butter for the crust—do that now. You want your melted butter to be cooled, not warm (makes it greasy/burn easy). Then, grease an 8×8 square cake pan and line it with parchment (see notes below), set aside. Preheat the oven to 350°F (180°C).
- Also make sure you’ve already peeled/cored/diced your apple and that all of the necessary ingredients are at room temperature (or they won’t combine evenly, mixture will be lumpy). Now you’re ready to bake!
Crust
- In a food processor, pulse the entire package of biscoff cookies until a fine crumb and pour into a small mixing bowl. Add your cooled, melted butter and mix together with a fork until evenly combined.
- Transfer the crust to your prepared cake pan and pat into an even layer (I use the back of a 1/4 measuring cup to help), making sure to get in all the corners. Bake at 350°F (180°C) for 10 minutes on the middle rack and then set on a wire rack to cool a bit while you start the cheesecake layer.
- You can start your cheesecake layer while the crust is baking—saves time!
Cheesecake + Apple Crumble
- In a medium-sized bowl with a hand mixer (stand mixer works too), beat your cream cheese and granulated sugar on medium-high for one minute, until somewhat fluffy and evenly combined. Scrape down the bowl. Beat in your eggs, one at a time on medium-high, until fully incorporated. Add in your sour cream and vanilla extract, this time mixing on low until the entire mixture is smooth and evenly combined. Scrape down the bowl with a spatula again. Set aside.
- Mix together your diced apples, granulated sugar, and cinnamon in a small ball until evenly coated. Set aside.
- In a separate medium-sized bowl, mix together your brown sugar, flour, oats, and room temperature butter with a fork (or hands) until it starts to come together and you can form various sized clumps (can take a minute). Set aside.
- Pour your cheesecake mixture over your slightly cooled crust, tapping on the counter a few times to release any air bubbles. Gently sprinkle your spiced apples in an even layer overtop (don’t drop from too high or they might sink in). Sprinkle your crumble over the apples until the top is evenly covered—it’s a lot of crumble, but just trust me.
- Bake at 350°F (180°C) for 35-40 minutes (my oven needed 40), until the crumble is lightly browned and the cheesecake layer has set (jiggle the pan: if edges stay put, but there’s still a slight jiggle to the middle—you’re done!).
- Once done, let it cool completely on a wire rack before covering with plastic wrap and then chilling in the fridge for at least 3 hours, up to overnight (see notes below). Once it’s done chilling, if you can release it from the pan all at once to cut into bars then do so, otherwise just cut it into bars while still in the pan. Enjoy!
Store in an airtight container in the fridge for up to 3 days.
Notes
- Pan Prep: I use pre-cut square parchment paper that has a bit of overhang on two sides to help with the release. You can just as easily cut a longer piece of parchment the same width as your pan, giving yourself enough length that it comes up past the top of the cake pan on two sides (like little handles for you to grab onto and pull up).
- Cooling/Chilling: If you don’t let the pan cool completely before covering with plastic wrap and chilling in the fridge, the residual heat will cause some condensation on the inside of the plastic wrap that will drip right back down onto your crumble—we don’t want that, do we? Give your pan a good hour or so before wrapping and chilling for another 3-4 hours (or overnight).
Check out my other recipes with Yes! Apples:
- Apple Pecan Scones
- Apple Cinnamon Pocket Pies
- Fresh Apple Oatmeal Cookies
- Apple and Almond Cream Galette
Looking for something else to bake?


These bars turned out great! I’m a sucker for any excuse to use Biscoff cookies in my baking and these did not disappoint. Baked for just over 45 minutes and they came out perfect. Will definitely be baking again!
Makes me so happy! Thanks so much for making (and also sharing on IG)!
Hi, you say use flour in the instructions for the crumble, but you haven’t put an amount in the ingredients for the recipe. I’m in the middle of baking this, so it’s kind of distressing! I don’t know how much flour to put in now. Will go and consult some other recipes if I can find any.
Sorry about that Victoria! It seems to have gotten deleted somehow (it was there for others who have already made it)–I’ve added it back in. Again, sorry about that! Typically it’s even amounts for the dry ingredients.
I knew I wanted to make these as soon as I saw them and they did not disappoint! Delicious! Will be making them again next weekend to take to a party.
Plans to make them again? Best compliment!! Thank you so much Amy–happy they turned out well and tasted as such too!
Ok, I chopped up some crystallized ginger and tossed it in with the apples on my second batch and I highly recommend this addition! They were a huge hit at the party.
Ahh yes! Love to hear this and love the crystallized ginger addition—YUM. Thanks so much Amy!!